Clay is what we work with. If you're like me, you're not digging it out of a cut in a hillside or mixing it like bread dough from different ingredients. The Hawaii Potters Guild (HPG), where I do most of my potting, orders clay from Laguna and Aardvark. When the clay arrives, it's placed in a storage area where it's stacked up in columns above signs which announce which clay is in boxes underneath: Black Mountain, Soldate 60, Rod's Bod, and so forth. Each box weighs 50 pounds and contains two 25-pound bags of clay. All of it is cone 10 clay, which means that it fires to a rock-like hardness at just under 2400 degrees Fahrenheit. There are limits to the amount of clay that HPG will let you use each 10-week session. If you're a member, you can use up to 5 bags (125 lbs.). If you're not a member, you can use up to 4 bags (100 lbs.). So, when I want a bag of clay, I fill out an order form and staple a check to the form. Within a few days a bag of clay will appear underneath one of the metal shelves with the name of the clay and with my name.
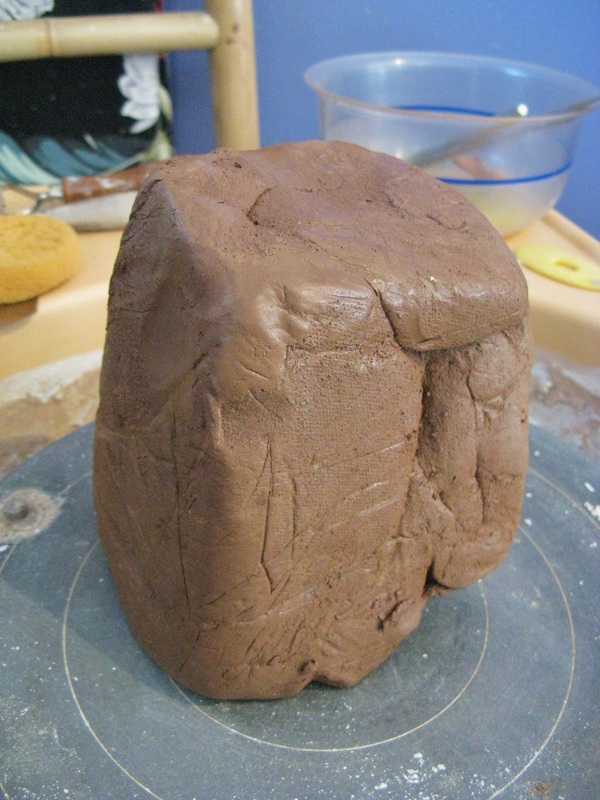
I've tried every clay that HPG has in stock and I've learned a few things from each one. In today's blog I'm sharing how important it is to get your clay to the right consistency before you even think about placing it on the wheel. Recently I received a bag of Black Mountain that was too soft and a bag of Coleman Porcelain that was too hard. I struggled with both but for different reasons. Figuring out whether clay is too hard or too soft or just right for what you're throwing is one of the most important ways to increase your success on the wheel. Different forms may need different consistencies of clay to throw more successfully. If I'm throwing plates, I want the clay to be softer so I can flatten it out more easily. If I'm throwing vases, I want the clay to be stiffer so it will stay upright as I pull it higher. I can't give you a method for determining whether the clay is too hard or too soft or just right. You have to become aware of the clay's consistency and whether or not it's appropriate for the form you're throwing. Experience will teach you in proportion to how attentive you are.
If the clay is too soft, take it out of the bag, divide it up into smaller pieces, flatten it out a bit to expose more of its surface to the air, and stand it up on end. I usually don't put my clay in direct sunlight since parts of it will dry too quickly and may even create hard pieces that will refuse to mix in with the rest of the clay when I wedge it. If I'm drying out clay like this, I keep coming back to it and rewedging it a bit to expose more of the wet clay underneath. Wedging the clay on a wedging table also decreases moisture in the clay because underneath the canvas is plywood, concrete, or plaster which is porous.
If the clay is too dry, you can try different strategies. If your clay's close to the right consistency but seems a little dry, spray water on it as you're wedging. This is a little tricky since the wedging table is absorbing water as you're trying to add it, but if you stay in the same spot on the table and don't keep moving your clay around, soon the material underneath will become waterlogged and will stop absorbing so much moisture. If the clay is harder, you can wedge in softer clay of the same type, maybe scraps from a pot you just threw. If the clay is very hard, you can use several strategies. If I'm in a hurry, I use a wire to cut slabs of clay no more than an inch thick which I submerge in water. In about an hour they're ready to wedge. Another way to get smaller amounts of clay ready in a hurry is to break up 2 or 3 pounds of hard clay into small pieces, place them in a gallon Ziplock bag, pour some water in, and lay the bag flat. Press the pieces of clay down until they're moistened. Wait about 10 minutes, open the bag and pour out the excess water. These are sloppy methods, but they work if you need the clay right away. If you're not in a hurry, poke holes in the clay with something like a screwdriver, put it in a clay bag and pour water in. It should be ready to wedge in a day or two. If the bag of clay is rock hard, make sure it's sealed at the top, place it in a 5-gallon bucket and pour water in up to the top of the clay. The bag is slightly porous and will allow moisture to seep in slowly. If your clay is hard and it's been kept in a sealed bag, then moisture has leached out of the clay through the bag. By surrounding the bag of clay with water, you're using the same process but in the other direction. Within a week or so the clay should be ready to wedge.
 RSS Feed