 Hsin throwing a tea pot off the hump.
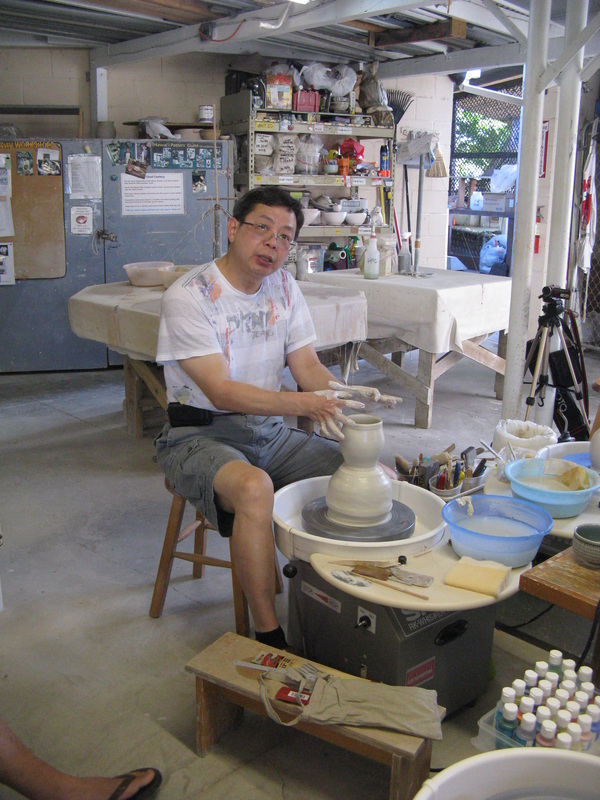
 This past weekend I had the privilege of attending a workshop with Hsin Chuen Lin at HPG. Hsin (pronounced like "sin") may be familiar to many of you as the Taiwanese/American potter who has so many excellent videos on youtube. As soon as I started potting I went to youtube for help and soon found his videos to be the most helpful for me.
Hsin gave demonstrations on a wide variety of topics, everything from spiral wedging to glazing techniques to making trimming tools from hacksaw blades, but most of his instruction was about wheelthrowing and altering thrown forms. It was great to see him working at the wheel, but it was especially important to ask him questions along the way, to have him stop and show us what he was doing and why.
I had an opportunity to speak with him at length about how he got into pottery and his life as a potter. Here are a few of the things he shared with me. He grew up in Taiwan and attended a Taiwanese university studying to be a mechanical engineer. Like so many other stories about potters that I've heard before, he decided to take a ceramics class and fell in love with it. He ended up majoring in ceramics and after graduation taught school for a few years. He decided to go to graduate school for his MFA, but since there were no MFA programs at that time in Taiwan, he chose to study at the University of Iowa. After Hsin and his wife graduated from Iowa, she took a job in California and he went with her. When he turned 50, after many years of teaching and making pots, he began to wonder "why am I here in this world," as he put it. He felt he'd developed techniques that would be useful to many people but needed a platform from which to communicate them. Soon a video of Susan Boyle singing on "Britain's Got Talent" went viral on youtube and caught his attention. Suddenly it clicked that he should make instructional videos on youtube that would communicate all that he'd learned over the course of decades of working with clay. And they have. Since 2010 when he posted his first video, his videos have had more than 1 million views.
At one point the two of us were wedging clay together at the wedging table and I asked him what potters have had the greatest influence on his work. I was surprised when he said "Peter Voulkos and Don Reitz." He explained that his ceramic program in Taiwan had trained him well to make classically shaped vessels but during his MFA program he had the opportunity to take workshops with Voulkos and Reitz which changed his approach. Under their influence he began slashing and punching and cutting one vessel after another. In time he found a way to blend both influences and it helped me understand better why many of his finished pots look quite different than they do when they're fresh off the wheel. It was interesting to me that almost every time he made a classically shaped pot during a demo, he would end up altering it in some way that made it less "perfect."
 Hsin making trimming tools from hacksaw blades.
 Hsin is not just a great potter, he's also a masterful teacher. Here are a few things I learned. They may not seem like much, but they're refinements that have made a significant difference in my potting. First, he showed me how to curl the fingers of my left hand to move the clay from the bottom of the cylinder more efficiently. I've seen him explain this over and over again in his videos and I thought that's what I was doing, but I was really holding my fingers too flat against the clay. I was using the pads of my fingers, not the tips. He made me aware of how I was thinking too much about what I was doing with the knuckle of my right hand and not thinking enough about the fingertips of my left hand. If you aren't doing this, try to consciously curl your fingers and hold them steady as you're lifting the clay. You won't believe how much more clay you can move by just pressing your fingertips at a 90 degree angle into the clay. In fact, a few times I went overboard and moved too much at a time and thinned the wall so much I torqued the whole pot! Second, he showed me how to use the very tip of my fingers when I was closing in the top of a pot. I thought I was doing what he was doing, but again I was using the pads of my fingers which created too much drag and would often cause the clay near the top to deform. He showed me how the smallest point of pressure can move the most clay while at the same time creating less drag. Third, he showed me how to hold my left arm so it wouldn't lay down on the top of the cylinder. I was vaguely aware that I was doing this, but he showed me how to keep my elbow up so I wouldn't create more friction at the top of the cylinder. Fourth, I learned how to belly out a cylinder using just my curled fingers. I still used ribs inside and out to give the pot its final shape, but using my fingers until the very end gave me more control over the clay. I'd noticed many times that when I used ribs for all of the shaping that often I would push the clay out too quickly or expand the cylinder more than I intended. Fifth, he not only showed us how to make trimming tools out of hacksaw blades, he also showed us how to use them. I've seen him trim pots on youtube many times, but something clicked this time that I hadn't noticed before. Many times I get frustrated when I'm trimming pots because as I trim the clay with a loop tool it goes right back on the pot and sticks there, mucking things up the next time the pot spins around. I've used traditional Asian trimming tools like he uses, but he showed me that I was holding the tool incorrectly with the blade open toward the foot. Instead, he showed me how to hold it with the back of the tool facing the foot. Rather than the clay slicing off and laying back down on the clay, the clay curls up on the tool and flies away. I don't know why I hadn't seen this in his demos, but I hadn't. If you haven't tried this before, try it now. He also sharpens his trimming tool briefly on a stone before using it which makes it cut much more efficiently.
In February I'm taking a workshop with Carol Gouthro, another great potter, and I'll let you know how that goes.
In February I'm taking a workshop with Carol Gouthro, another great potter, and I'll let you know how that goes.
 RSS Feed