I'll start by saying that ceramics is not a single skill but a cluster of skills. These skills are essential to the process of making pots, but they're not related in any other way. Skill at forming pots has nothing to do with trimming pots or making glazes or decorating pots, and firing kilns is something totally different still. They are all part of the process, but each stands alone as its own skill. Below are some of my observations about the firing of kilns and how to become more skillful at doing it.
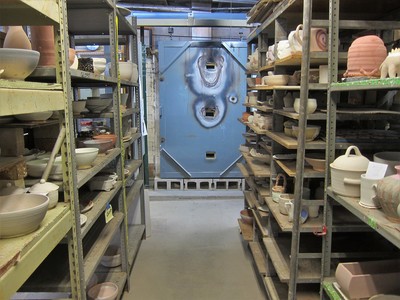
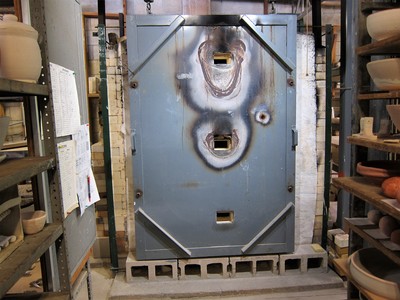
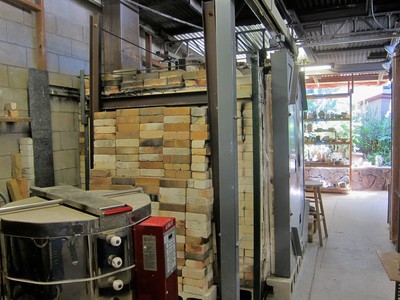
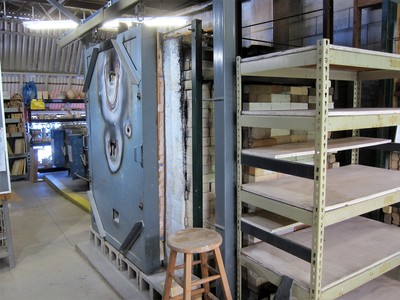
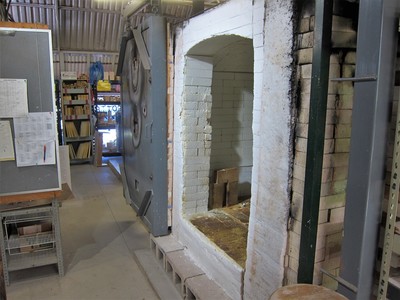
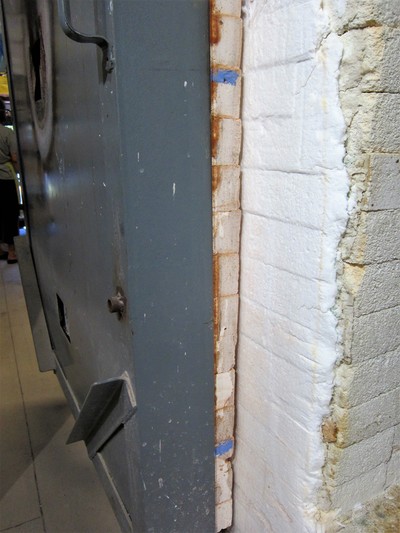
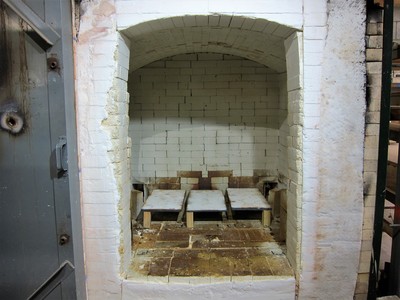
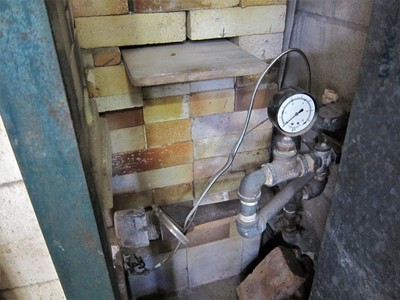
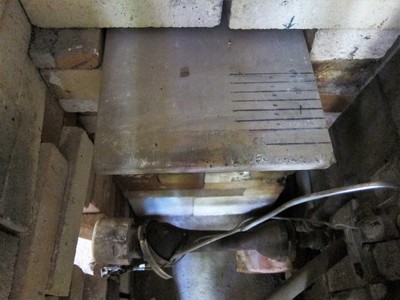
Let's look at the kiln first, in this case the kiln at HPG since that's the only one I'm familiar with. Our kiln looks relatively small, but you can get hundreds of pots into it by stacking them floor to ceiling. It's rectangular with an arched top and two Venturi burners at the bottom of one of the short sides. The inside walls are lined with soft firebricks which are made of refractive clay to withstand the heat. A layer of hard bricks line the floor of the kiln and form a second layer around the walls of soft firebricks. A layer of ceramic fiber insulation lies on top of the arch over the hard bricks. The whole kiln is held together with an external steel frame. A heavy metal door slides on a rail and the part that faces the kiln is covered with firebricks and insulation. Two bars are placed outside of the door and tightened to keep it snug during the firing. This is a downdraft kiln which means the fire enters from the bottom, shoots up to the top of the kiln, comes back down to the bottom and then exits through two flues at the base of the kiln and up the chimney. These super-heated gases flow over the pots during their journey from bottom to top and back to the bottom again. When you're firing a kiln, one of the most important things you're doing is heating up the kiln itself. At first all of the heat is coming from the burning gas, but as the firing progresses and the kiln absorbs more heat energy, more and more heat is coming from the radiant energy being emitted from the kiln walls, the shelves, the posts and the pots.
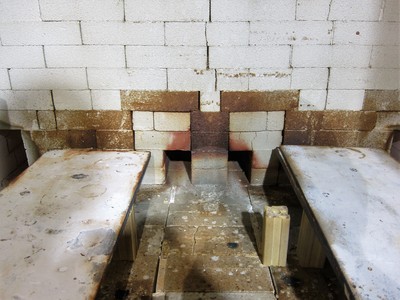
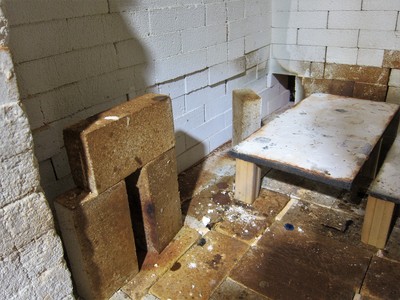
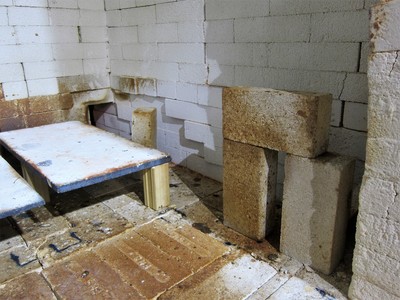
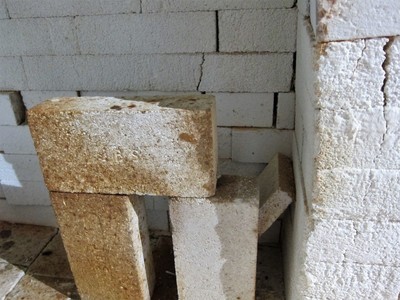
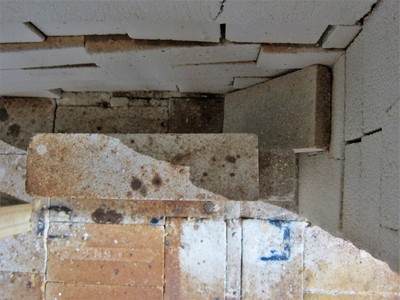
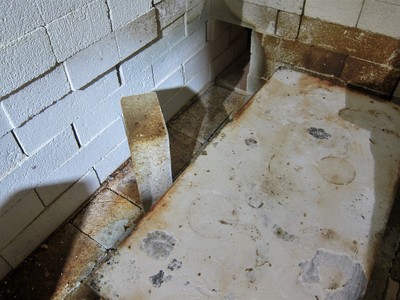
When this kiln was first built in the 90's, apparently it wasn't firing well so HPG invited Nils Lou, a well-known authority on kilns, to come to Hawaii and see what the problem might be. When he inspected the kiln, he noticed right away that the flues were too large. Originally each of the openings was 10" by 7" and Nils made them 5" by 3.5". A less commodious opening might seem to restrict the flow of air, but its effect is just the opposite. Used in conjunction with a very tall chimney, it creates more draw which sucks gases more quickly out of the kiln and up the chimney. While Nils was here, he trained some of the firers, including Kenny Kicklighter, and people bought copies of his book, The Art of Firing. I have a copy now and think it's the best thing I've read about kilns and what actually happens during a firing. One of the most important adjustments Nils made in our kiln was to introduce a simple firebox. Rather than a solid wall of firebricks, Nils placed a single brick about 12 inches away from the burner and 3 inches from the wall. Originally he placed the brick parallel to the wall but we found it worked better if it was placed at a slight angle so some of the flame was directed toward the inside of the kiln and the rest toward the back wall. At the back wall was a configuration of four bricks. Two of them stood next to each other with a gap between them and another brick sat on top. A fourth brick sat against the back wall at a 45 degree angle which directed the heat upward. The gap between the bricks could be made smaller or larger which would fine tune the amount of heat that would travel up to the top of the kiln and how much would be directed toward the bottom. I've experimented with different configurations of these bricks, both the single brick near the burner and the four bricks near the back wall. I'm still working on this since I only make a single change each firing and then note what effects take place. Moving any of these bricks even half an inch can make a substantial difference in the top getting hotter than the bottom or vice versa.
In my opinion, loading the kiln is the most important part of firing. Why is it so important? Because pots fire better in different parts of the kiln depending on how thick or thin the clay body might be, how thick the glaze might be, and whether or not the glaze needs reduction. Thickly potted pieces can withstand more heat without distorting so we load them closer to the bottom, the hottest part of our kiln. Thinly potted pieces are always placed closer to the top, the coolest part of our kiln. Thickly potted pieces can go anywhere and will be fine, but thinly potted pieces, especially bowls, will distort quite a bit if placed too low in the kiln. If a piece has been thickly glazed, especially if two or more glazes have been used, it's prudent to load it higher in the kiln where it's cooler. A thickly glazed piece placed near the top of the kiln might turn out fine while one that's placed near the bottom will run onto the kiln shelf and be a total loss. If the glaze needs reduction it should be placed where reduction is good, usually higher up in the kiln. If placed on the bottom, celadons, chuns and many other glazes will not develop good color. So when we're loading the bottom third of the kiln, we're looking for pieces that are solidly built and have stable glazes that don't need reduction. In our studio that includes glazes like Shino, Mamo, Miller White, Spodumene, Glossy White and G-Black. In general, all of the white and black glazes can be placed low in the kiln, though we place Tenmoku higher in the kiln since it tends to be runny.
I usually have a crew of two people who help me load. I also have two other people who can help me load if one or both of my crew can't make it. Other people might join in on occasion, especially if they want something they made to get into the kiln, but more than three or four people (including me) starts to get a little crowded. Throughout the loading, at least one person is helping to organize pieces according to height and glaze. This has cut down our loading time by at least a third. So one person is organizing by height and glaze while another is handing me pieces to load. If I have a fourth person, they organize groups of fillers, small pieces that we can tuck into gaps between pots. While people are helping me load, I'm showing them things so they can learn how to load and fire the kiln themselves.
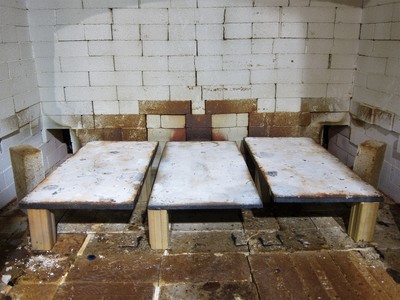
In our kiln, we have three rectangular kiln shelves across the back, two square ones in front, and one layer of small rectangular shelves in the very front. That configuration has changed a bit over the years and probably will continue to change. I start with five-inch posts for all three courses of shelves, mainly because that's how tall the flues are and to allow air to flow easily into them. Until a few firings ago I randomly, maybe chaotically, stacked shelves in the kiln. Because I was having trouble getting the kiln to heat evenly from top to bottom, a colleague suggested making the shelves higher at the bottom, narrower toward the middle, and then higher toward the top. The last few firings I've started with two kiln shelves of five inches, two of four, two of three, two of two, then two of three, two of four, and so forth to the ceiling. I don't know if this will help you get more even firings in your kiln, but it seems to help with ours. Other adjustments include not stacking the bottom too thickly with fillers but spreading them throughout the kiln so one area isn't more densely packed than another. Another adjustment has been to make the height the same for all of the shelves in every stack front to back. For instance, it seems to increase turbulence in the kiln when all of the shelves are four inches in one layer front to back, three inches in another layer, and so forth.
When I first started firing, everyone told me that the higher up in the kiln a piece was placed, the better the reduction. I wondered about that after an early firing when I saw something strange. One of our potters had made dozens of small flat pieces that were glazed with Primavera Green, a celadon that needs good reduction. I had placed some of these near the bottom of the kiln (a mistake), and there was a row of them at the front of the shelves that stretched from one side of the kiln to the other. What I noticed was that pieces next to the edge on both sides ended up a solid tan. The pieces closer to the middle were half tan and half green, and the pieces in the middle were solid green. As a result I began placing small pieces of Rod's Bod on the inside and outside of each kiln shelf and found over several firings that reduction in our kiln depends on not just a piece's location from top to bottom but also from side to side. I like to picture it like a V. The lower in the kiln a piece is placed, the closer to the middle it should be in order to get good reduction. As you add shelves and move closer to the ceiling, the farther out toward the edge you can place pieces that need good reduction. My guess is that more highly oxygenated gases are found on the sides near the bottom where new air and gas are being introduced from the burners and where the turbulence is the greatest. The volume of carbon monoxide increases both as these gases move up the sides of the kiln and closer to the middle of the stack where there is less turbulence. So on the lowest shelves I place pots as close to the middle as possible if they have glazes that need reduction and place pots that don't need as much reduction like Shino and Miller White on the outer edges. The higher up the stack goes, the farther out I can place pots that need reduction until I get near the top where I can put pots that need reduction all the way to the edge.
Over time I've noticed that certain glazes do certain things in certain parts of the kiln. Some of that is based on studying pots when they're being unloaded and some is based on placing pieces with certain glazes in different parts of the kiln to see what happens. I know that glazes like Tenmoku will turn black in certain parts of the kiln with better reduction but will be amber or rust colored if fired in other parts that are more oxidized, that Stoney Matt Blue will not melt sufficiently if placed in cooler parts of the kiln and will end up a dry matt. I've had many glazes, especially matt glazes, that will develop a "sugary" surface from micro crystalline development if placed in the back top left. I place Oxblood on the top right front because I've had the most success firing it there. If I want more oranges with Shino, I fire it at the bottom where it's hotter. If I want Shino to trap more carbon, I fire it near the top of the kiln. I'm not saying any of these placements would work the same way in your kiln, but I'm suggesting both to keep your eyes open and to do some systematic experimentation. I'll give you an example of one of my experiments. A fellow potter at HPG was making a series of jars using B-Mix and spraying on Plum Chun. Over the course of several firings, I placed her pots in different parts of the kiln until we came up with a result that pleased her. I almost wrote that "we came up with the result she was looking for." The fact is she wasn't sure what the glaze might do and was only sure what she liked after seeing the results of several firings. In a cooler part of the kiln the glaze was a uniform matt lavender with very subtle variation in color; in a hotter part, the glaze looked good but almost always ran on to the kiln shelf. Finally we found a place where we were able to get consistent results that were to her liking: lavender with highlights where the blue glass matrix was exposed and tiny pink crystals were floating on top. I've also noticed that some of our iron yellow glazes (Butter Yellow and Stoneware Yellow) will turn glossy instead of matt when they are put on thickly and fired in hotter parts of the kiln. This is true of many glazes, especially when fired on clay bodies with lots of iron. Longbeach Blue, for instance, develops a matt blue color that relies on a great deal of material not melting in the glaze. If too much melts under intense heat, the glaze begins to pick up more iron from the clay body and becomes an olive color with brown highlights and patches of blue crystals. That looks good on some pots but I've thrown away plenty of these that looked awful.
I'm not going into the details of closing up the kiln, turning on the gas and lighting the burners, candling the kiln (if you do that), or using an oxygen probe and temperature gauge. Those things should be taught by a mentor and many of them are specific to each particular kiln. What I'll discuss next is what many potters call the three most important concepts to understand about how kilns work: temperature, atmosphere, and time. To be successful at firing kilns, you must understand how these three work together.
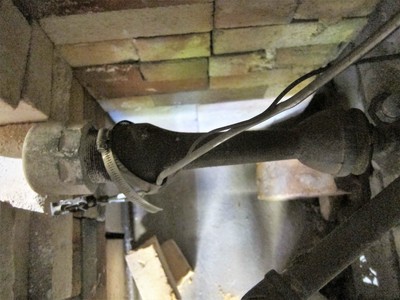
Let's look at temperature first. All of us know that kilns have to get hot in order for clay and glazes to get hard and shiny. The way we get our kiln hot at HPG is through combustion, through introducing a certain amount of gas and air into the kiln through two Venturi burners. Before our kiln could be fired, wider diameter pipes had to be installed so more gas could flow to the burners. Not enough gas, not enough temperature. We call the burners "Venturi" after an Italian scientist who found that when liquid is flowing through a pipe or hose and becomes constricted, the flow of liquid slows down before the constriction but its velocity increases when exiting the constriction. Look at a Venturi burner and you'll see that it's the same size as your gas line where it connects with it, but then it narrows and then widens again at the burner head. If you look at the head of the burner, you'll notice that it curves slightly inward to create a more focused and hotter flame. If you didn't have these features, if you didn't have a greater volume of gas, the constriction in the flow of gas that increases its velocity or the shaping of a hotter blue/white flame, you'd have a lazy orange/red flame that could never get the kiln up to temperature.
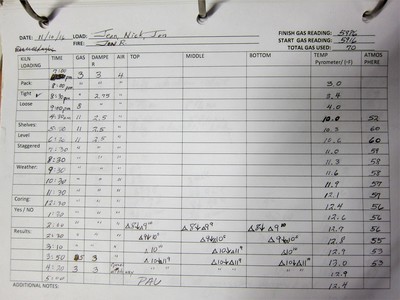
Getting the temperature of the kiln and the ware in the kiln up to more than 2300 degrees F is challenging. It took people many centuries to figure out how to heat clay up to stoneware temperatures or what people today call "cone 10." At first a firing is pretty straightforward: turn on the gas and watch the temperature steadily climb. But during the last 300 degrees or so, the kiln begins to do funny things. For instance, pressure builds up in the kiln as it gets hotter and that pressure makes it harder to introduce more heat. The kiln might "stall," which means the temperature moves up very slowly, stays at the same temperature, or even begins to drop. You might think that increasing the gas pressure will make the temperature rise more quickly but that will only make the problem worse. If you look at the logs at HPG that all the firers keep, you'll notice toward the end of each firing that most of them need to slightly increase the amount of air coming into the kiln and decrease the amount of gas. Increasing the air and decreasing the gas increases the efficiency of combustion and should help the temperature to rise again. So if the kiln begins to stall or the cones are going down faster on the bottom than the rest of the kiln, I'll open up the dampers a little and turn down the gas pressure from 11 to 10. In an hour I may turn it down to 9. I put this off as long as I can to make sure I get good reduction. As soon as I increase the air going into the kiln and reduce the gas pressure, reduction goes down significantly. To check this, look at the flame coming out of the top peephole before you make these changes. If you're getting good reduction, the flame should be long, durable, and have a strong yellow/orange color. Then check it after you increase the air and decrease the gas. The flame should be short and retreat quickly into the kiln. There may be no flame at all because reduction is no longer taking place. This is okay if you're right at the end of the firing, the clay has vitrified and the glazes are melting. Reduction can't make much of a difference at this stage anyway.
It's important to know that when you open the dampers, you're not letting more air in directly but indirectly. The dampers control the flow of gases out of the kiln and up the chimney, but by increasing the volume of gases that are sucked out of the kiln you increase the volume of new air that gets sucked into the kiln. All of this is related to the concept of "draw." Your chimney must be a certain height above the roof line in order for gases to circulate through the kiln and then be drawn or sucked up the chimney. If the chimney is not tall enough, your air circulation will be sluggish. If the chimney is shorter than the roof line of any part of the building, the gases won't go up the chimney at all. So if you have a one story house with a chimney and decide to add a second floor on one side of it, you must increase the height of the chimney or the hot gases from your fireplace will go into your living room instead of going outside.
Now let's talk about "atmosphere," the second important concept to understand in order to grasp how kilns work. In general, potters talk about two different kinds of atmospheres in the kiln: oxidation and reduction. An oxidyzing atmosphere is one in which combustion is complete. All of the gas is burned up and produces heat energy, carbon dioxide, nitrogen, and water vapor. An oxidyzing firing could be done in a gas kiln, but most are done now in electric kilns. A reduction atmosphere is created when too much gas and too little air is available for an efficient firing. This is done by both 1. turning up the gas pressure and 2. pushing in the dampers to restrict the flow of oxygen into the kiln. A reduction firing by definition is the result of incomplete or inefficient combustion. Because there is too much gas and too little air in the kiln, carbon monoxide is produced which seeks out another oxygen atom so it can become carbon dioxide. The long durable flame that comes out of the peephole shows the violence with which carbon monoxide seeks out that other oxygen atom. In the kiln, carbon monoxide penetrates the porous clay bodies in search of oxygen atoms. When the clay bodies vitrify, CO can no longer penetrate the body and reduction of the body diminishes or ceases altogether. At the same time, carbon monoxide is penetrating the glazes while they are still dusty on the pot's surface. When the glazes begin to melt, reduction diminishes or ceases altogether. That's why firing schedules will have places on them that say "Body Reduction" or "Glaze Reduction." Those temperatures don't mark when reduction begins but when you should start reduction before it's too late. Note too that the body begins to seal up before the glaze begins to melt. The reality is that both body and glaze reduction begin long before these temperatures that are listed on the firing schedule. Copper red glazes like Oxblood need a very long time for effective reduction to take place. When reduction takes place, the color of the glaze will change. Pete's Cranberry will only become reddish purple if the copper in it has been "reduced" by losing an oxygen atom to carbon monoxide. If it's not properly reduced, the glaze will be clear or tan. Oxblood, all the green celadons, CR-17, Nelson's Transparent, Chun, will all turn out clear or tan if not effectively reduced. All of these have copper or iron oxides that need a reduction atmosphere in order to become certain colors. Cobalt is not responsive to reduction. Some people think that a smoky atmosphere is necessary to produce a reduction atmosphere, but reduction is about carbon monoxide, not free carbon from smoke. Nils Lou has a great section in his book on reduction and he explains that too much free carbon in the atmosphere will actually inhibit reduction. The key, I've found, is to create a reduction atmosphere no later than 1600 degrees and keep it above 55 or so on the oxygen probe for almost the rest of the firing. Also, as I wrote earlier, it's important to place pots in the kiln where they will get the most exposure to a reducing atmosphere if their glazes need reduction. The temperature and atmosphere changes in different parts of the kiln. Even the way the kiln is loaded and the shelves are stacked effects the flow of gases and changes the temperature and atmosphere. There can also be a significant difference in temperature and atmosphere between the inside and outside of a piece. That's why I'll often use glazes effectively on the inside of bowls where they get better reduction than they would if applied on the outside of the same piece. Close observation and your own experiments can teach you the most about how your kiln works.
Time is the third part of the triad and the trickiest to understand. Temperature and atmosphere need adequate time to do their work inside the kiln. We have probes to measure temperature and atmosphere inside the kiln, but we need pyrometric cones to measure their effects over time. Cones don't tell us what the temperature is inside the kiln but how much of that heat energy has been absorbed by our pots. Time plus temperature is often referred to as "heat work," the time it takes for the heat energy in the kiln to mature both clay and glazes. I like to explain it like this. If you heat your oven at home to 350 degrees and then put a chicken inside to roast, you don't expect the chicken to absorb all of that heat immediately; you don't expect your chicken to have an internal temperature of 350 in five minutes. In fact, after an hour in the oven, your chicken will probably have an internal temperature of about 170 or so. Chickens aren't good conductors of heat and neither are pots. It takes a long time for them to absorb the heat energy that surrounds them in the oven or in the kiln. In fact, Orton makes it clear in its written material that the quicker a kiln goes up in temperature, the higher the temperature in the kiln needs to be in order to reach cone 10. It takes time, lots of time for the clay and glazes to effectively absorb all of that energy.
I've been part of the ceramics programs at three different places, and I've come to appreciate the older and more inefficient kiln at HPG. Why is it so important for our kiln not to be too efficient? First, it takes quite a bit of time to vitrify clay and melt glazes. Time is especially important for the development of complex glaze effects. I've already mentioned reduction and want to reiterate that reduction can't be achieved in a few minutes or even a few hours. It takes time and that means the temperature shouldn't go up too fast. It also takes time for glazes to achieve greater melt. When glazes achieve greater melt, more material is available in the glass matrix to form crystals when the glaze begins cooling. I should add that it doesn't seem to make a difference if you move slowly or quickly up to about 1800 degrees F but the rate of temperature rise from there does seem to have a significant effect on glazes. The second reason why I think it's good that our kiln is inefficient is because it takes so long to cool down. Slow cooling is so important, especially if you can slow down the drop in temperature for the first several hundred degrees. This is when crystals form in your glazes. That's why glass in windows is clear. It's cooled so quickly that crystals don't have time to form. If you want to see how slowly or quickly your kiln cools off, keep checking the probe every 15 minutes for an hour or two after you turn off the kiln. Check it again at 12 hours and 24 hours. I've compared that to the temperature drop after turning off an electric kiln, and the gas kiln cools down far more slowly because it's walls are so much thicker.
In my experience, the same glazes often look quite different from one studio to another because of differences in the firing schedule. Two other studios where I've made pots seem most concerned with starting and finishing a firing as soon as possible, usually within three days. They pride themselves with "getting up to temperature" in record time so they can save money on gas and then cooling the kiln down quickly so they can get pots back to students as soon as possible. At HPG we start the kiln at night, come back 8 1/2 hours later, and then spend 10 to 12 hours finishing the firing. The kiln cools down for 4 days before it's unloaded. So we spend more money on our firings and we spend more time waiting for our pots, but it seems to be worth it. I've seen some of the same glazes at different studios and they might be a solid color at those studios but would have more variable effects because of crystal development after a firing at HPG. I understand that some people want a consistent color overall, but that's not what I find attractive. If you want more variation in your glazes, it takes time to achieve good reduction, good melt and good crystal formation.
By the way, you may have wondered why cones have a numbering system that starts with cone 1 and goes all the way to cone 42 and then goes from 01 down to 022. The Orton website (the major American manufacturer of pyrometric cones; www.ortonceramic.com) explains that cones were first developed in the late 1800's for use in factories that produced ceramics, not for studio potters. Ceramics were fired in factories to at least 2000 degrees so cone 1 starts at about 2000 and cones go up from there at about 35 to 40 degree intervals. When people began developing better low-fire techniques at factories, Orton decided to use a zero rather than a minus sign to measure heat work intervals lower that cone 1. So the lower temperatures start with 01 and go down to 022.
Now I'll bring up a few issues about firing kilns that are important to me. These are in no particular order. First, find at least two people who want to become part of your loading crew and will consistently help you load the kiln. One guy from my loading crew, Hitoshi, has even instituted a new way of putting pots on the glost shelves according to height so we know immediately which pots need a 5 inch stilt and which need one that's 2 inches. The crew also keeps an eye on things so I don't make major mistakes. Every time I put on a new shelf, for instance, one of them checks to see if we have sufficient clearance for the pieces on the shelves below. Kiln shelves get warped and can touch pieces that you thought were the right height. Sometimes they remind me that we need to put a cone pack on the next shelf so I don't use posts that are too short.
Second, decide whether or not you're going to use kiln wash. HPG uses kiln wash and every time we unload the kiln we examine every shelf to see if it needs to be sanded down and given a new coat. We set up a table and at least two people are busy grinding down pieces of clay and glazes left on the shelf and applying new kiln wash. The only problem with using kiln wash on shelves is that you can't flip them over for the next firing or bits of the kiln wash may fall into pots on the shelf below. When your shelves get too warped, they must be replaced. If you don't use kiln wash, you can flip them over each time and they stay relatively even. The disadvantage with this approach is that you must make sure they are kept meticulously clean. Even the smallest dot of glaze left on a kiln shelf will stick onto the foot of a pot and can chip it when it's removed, especially with porcelain which has a tendency to fracture. At one studio in Honolulu that doesn't use kiln wash, virtually every one of my pots comes out with chips on the feet since the shelves aren't kept clean.
Third, I like to do what other potters at HPG call a "soak" at the end of the firing. Actually it's not a soak since we don't maintain the same temperature for an hour but instead decrease the gas pressure which causes a slow decline in temperature. I didn't start out doing a soak because I wasn't taught that it was important. In time I ran into a few potters who told me they used an hour-long soak at the end of the firing to allow glazes to develop better crystals and for bubbles to heal over. What I've found over the last several firings is that when I turn the gas pressure down to 5 for 30 minutes and then down to 3 for 30 minutes, I don't end up with any bubbles in the bottom of my large bowls. Glazes like Oxblood bubble up alot and this longer soak helps those bubbles to settle down and for the glaze to even out. It also makes sense that it would favor greater crystal development and I've noticed that some of our matt glazes will become sugary with microcrystals forming during slow cooling near top temperature.
Fourth, when loading certain types of pieces, make sure they do not hang over the edge of the shelf, even on the inside of the shelf. Thinly thrown bowls that stretch out from the foot, teapots with handles and spouts, sculptural pieces with appendages sticking out, and mugs with handles are all the sorts of things that I make sure I don't hang over the edge. When you hang parts of a pot over the edge of the kiln shelf, especially on the outside of the stack next to the kiln wall, that portion of the pot will get slightly hotter than the rest of the pot which will effect shrinkage. When my large bowls are hung over the edge, for instance, they tend to curl up in that one area. Pieces that are more sturdily made, especially ones that are more thickly thrown, don't seem to be effected at all by hanging over the edge. Still, I keep everything away from the edge if at all possible.
Fifth, keep a notebook just for the kiln that will include observations you want to make about each firing. I read these periodically or at least skim over them to remind me of what I've seen so far. At the beginning, Matt Kriegler helped me write out a list of things to do to light the kiln and I go through this protocol step-by-step each time I start the kiln. I've received advice from more experienced firers and I write these things down and try them out if they seem to make sense. I might try a different configuration for my posts, or turn the gas up at certain times or close the dampers a bit based on their advice. I also study the logs that other firers have kept to get some idea how they did their firings. Anything I see that might help I add to my own technique.
Sixth, read as much as you can about kilns and how to fire them. The Art of Firing has taught me the most about firing a gas kiln but it's hard to find and expensive when you do. I've found some good resources on the internet, especially at places like The Big Ceramic Store (www.bigceramicstore.com). They have helpful technical articles scattered throughout the site. Books on glazes often have good information about firing kilns and I've learned a great deal from John Britt's book, The Complete Guide to High-Fire Glazes. He has two chapters in particular on "Measuring Heat" and "Kilns, Firing, and Safety" that are packed with important information. I read these sections each time I fire since I'm more focused then and since the ideas make more sense the more I fire the kiln.
Seventh, study the pots that are placed on the finished ware shelves. There is so much to learn from each pile of pots that's been freshly fired. I take my time with this, examining the glazes, see how different combinations worked or didn't work, how crystals formed, how thickness and thinness effect the glazes and how glazes interact with different clay bodies, On the day we unload the kiln, I always open the kiln door in the morning and spend at least 30 minutes or so unpacking the small stack of shelves at the very front. When the first stack is unloaded, I'll examine pots at the front of the first large stack and go through the same process of making mental and written notes of what I see. Several hours later, when the rest of the kiln is unloaded, it takes me about 45 minutes to unload hundreds of pots. Pots are flying out of the kiln so fast there's no time to examine each piece. I slow down a little if I see something extraordinary, but I can't do that much with 7 or 8 people waiting for me to hand them things.
Finally, let me talk about mistakes. I've made plenty of them and have been fortunate to have some very patient people working with me. Here are a few mistakes I've made which are chosen from a much longer list. I was loading the kiln and had gone up about six shelves when I noticed that the kiln post configuration that I was using was different than the configuration at the bottom of the kiln. I had to unload all of those shelves and start over. I was thankful for a patient loading crew! Another time my post configuration was wrong at the front of the kiln so that it would have been impossible to properly position my cone packs in front of the peep holes. Thankfully I caught this one after just a few shelves had been stacked. One time I put in a cone pack when I was using 3-inch posts. When I put on the shelf, it broke the cones! Another time I decided to try candling the kiln for an hour and kept the fire bricks out of the peep holes during that hour. After an hour I turned up the gas pressure and left for home to get some sleep. When I came back the next morning the peep holes were still wide open and the temperature wasn't close to what it normally would be, so I was at HPG until late that night. Well, those are a few of the major mistakes I've made while learning to fire the gas kiln. You'll make your mistakes as well, but I hope you won't let them discourage you too much. You'll be as careful as you can be but you'll still break some people's pots while loading, and you'll place pots too close to each other so they fuse together. Some people will be upset at you because you didn't load their pots in your firing or their pots didn't turn out the way they wanted them. It's all part of the process! So do your best and in time you'll become skilled at firing your gas kiln.
 RSS Feed