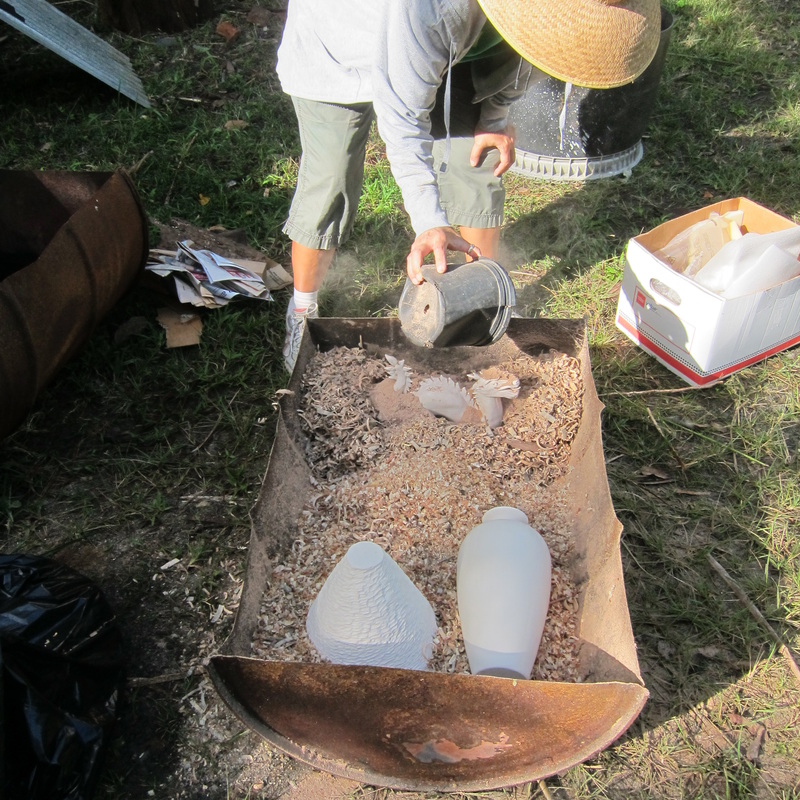
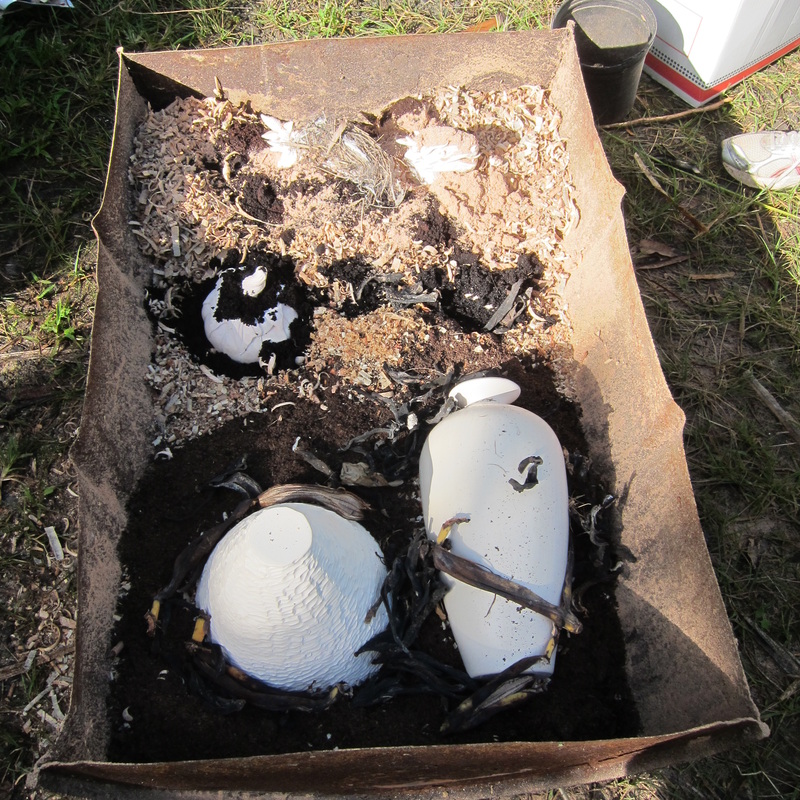
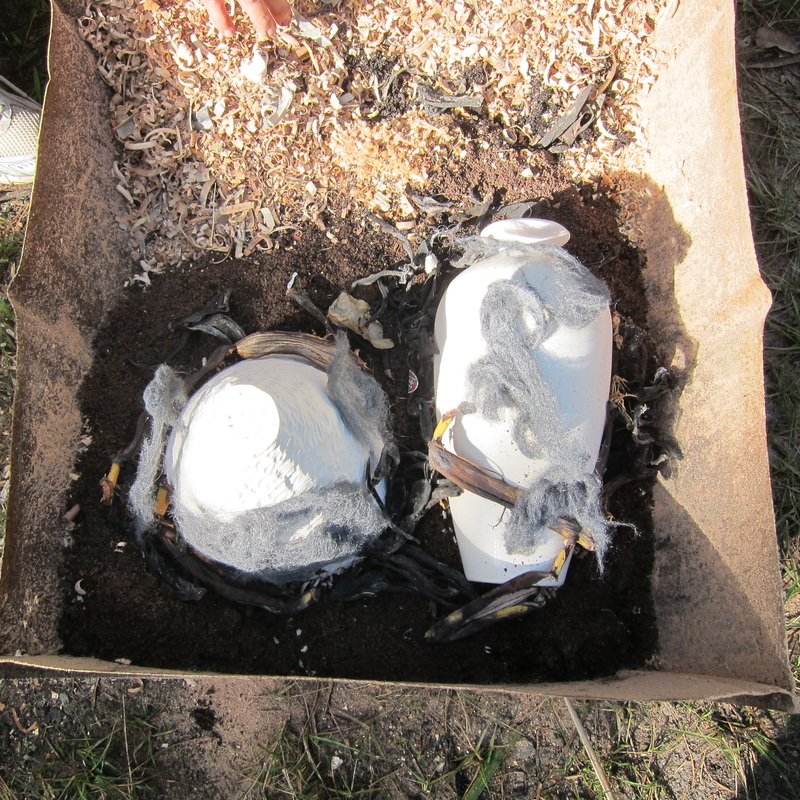
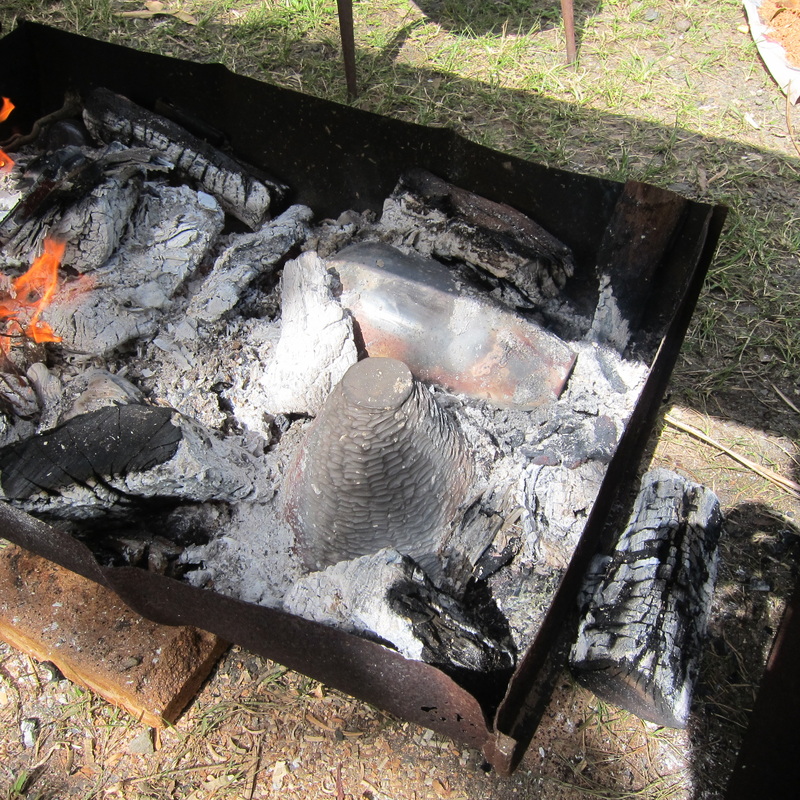
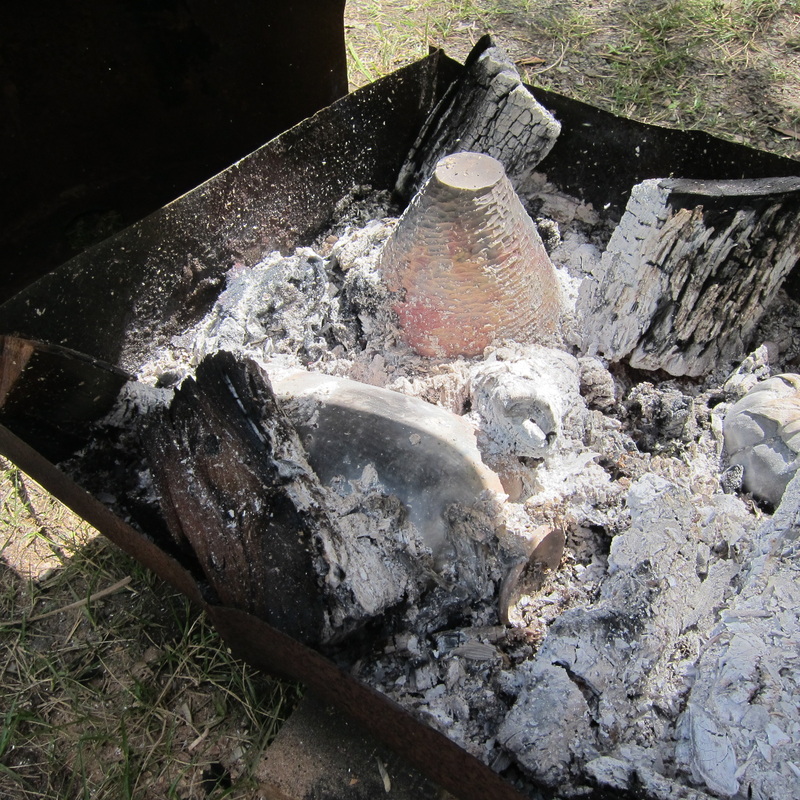
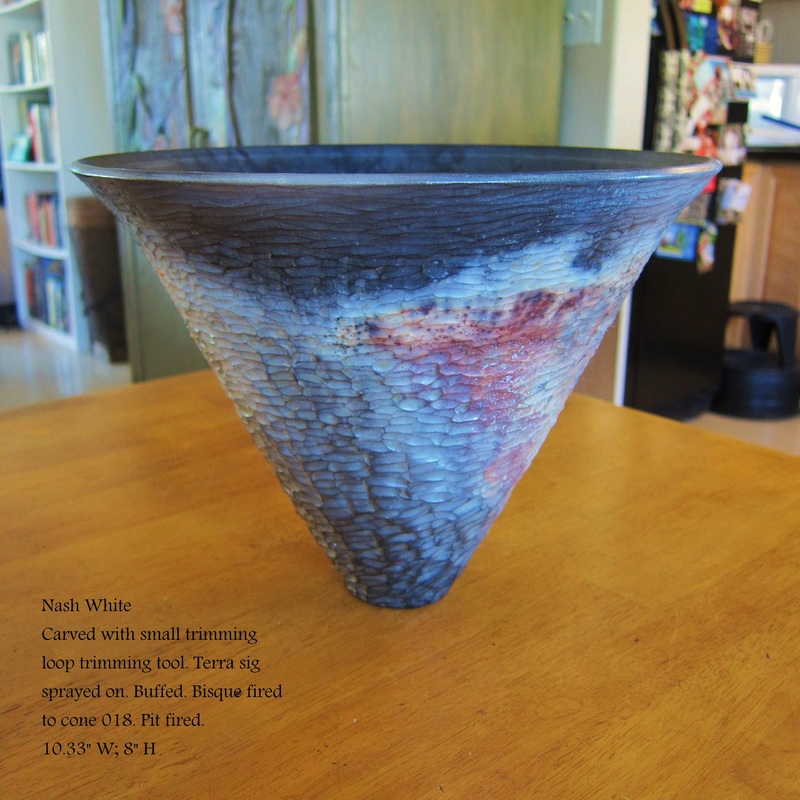
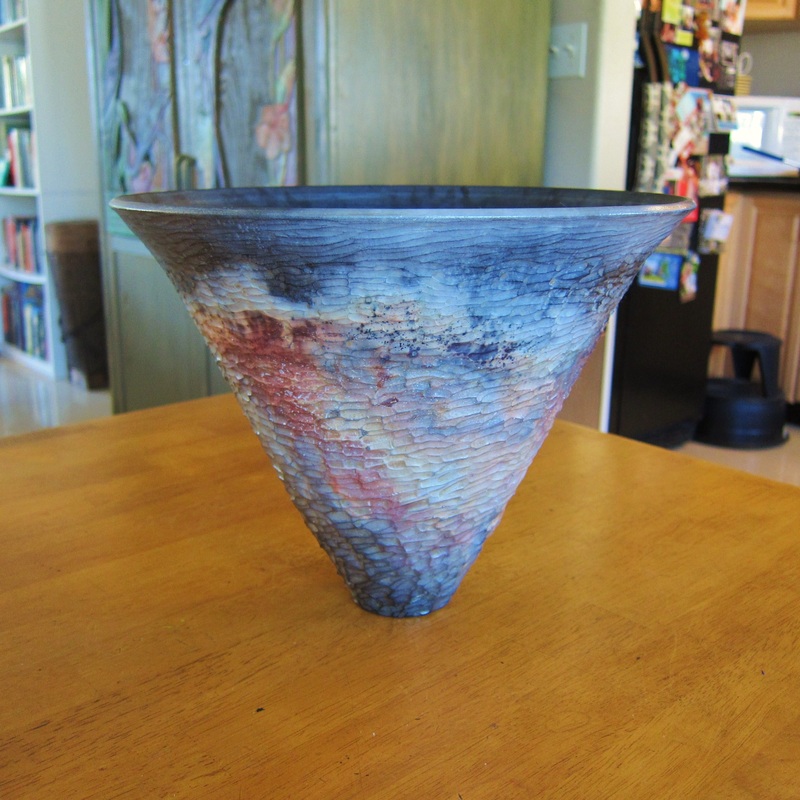
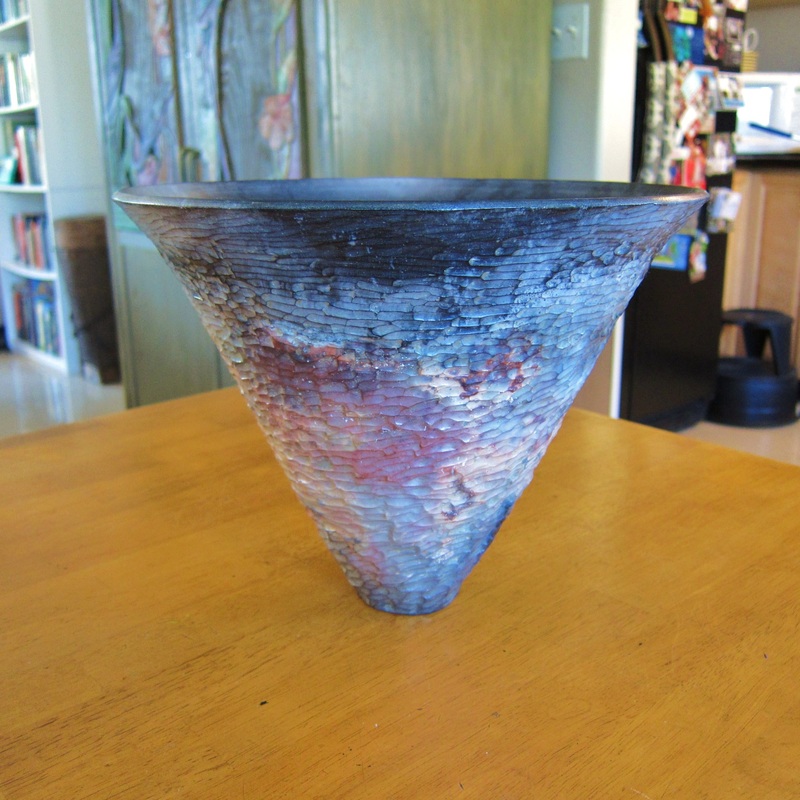
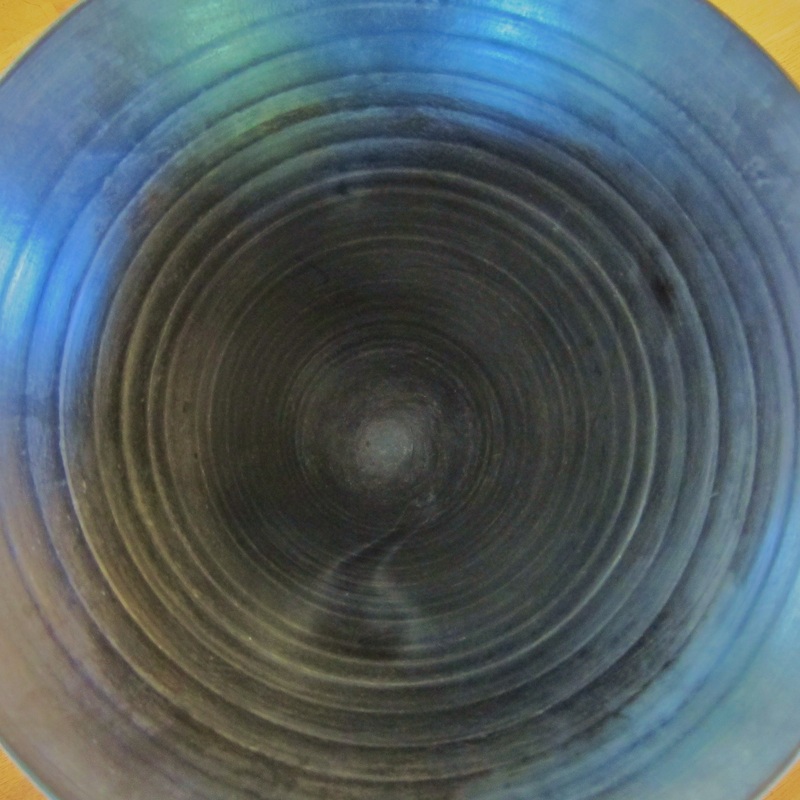
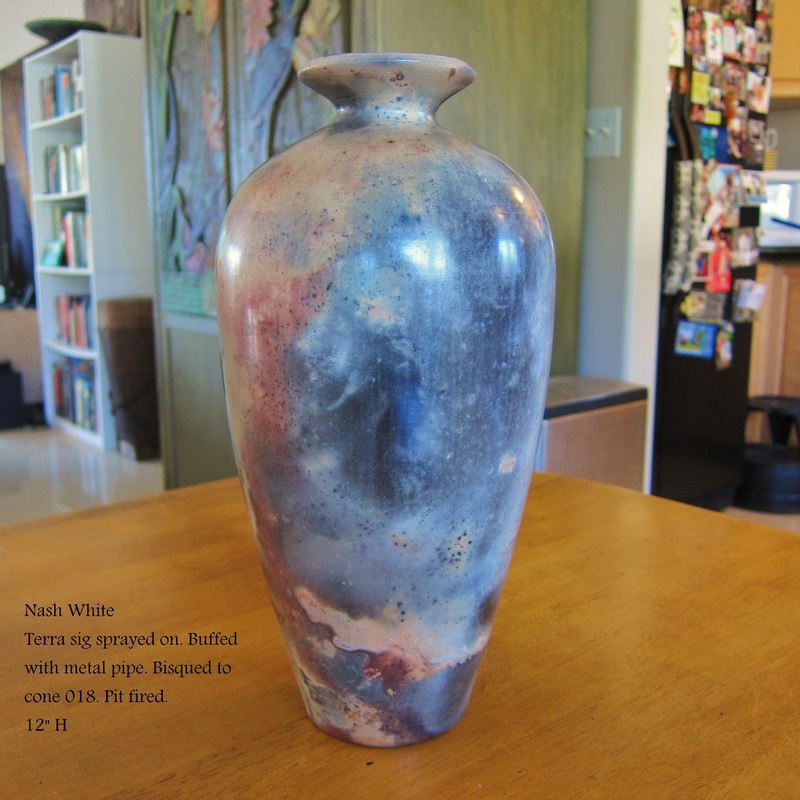
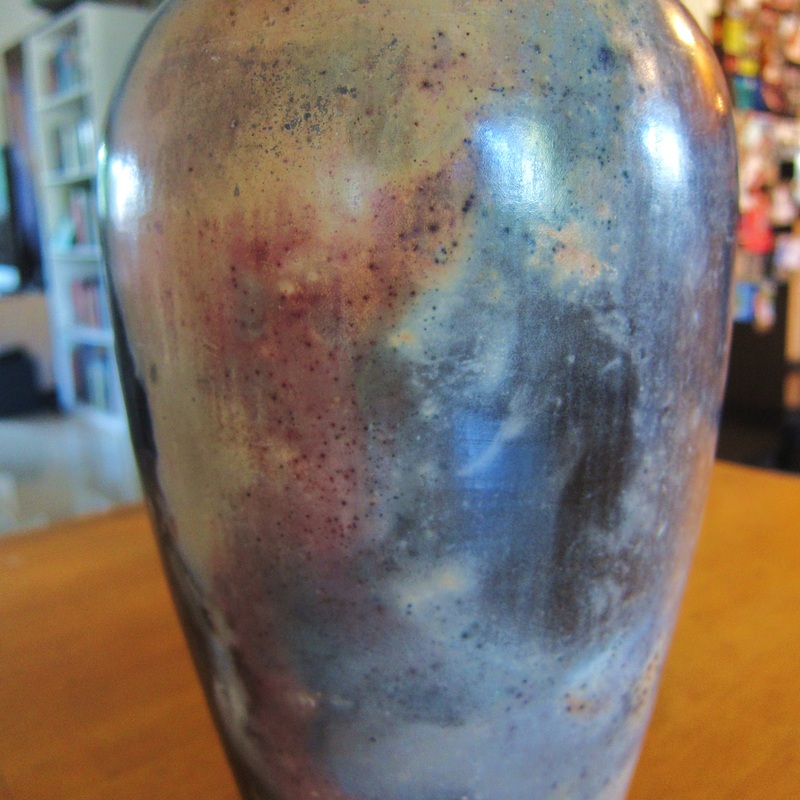
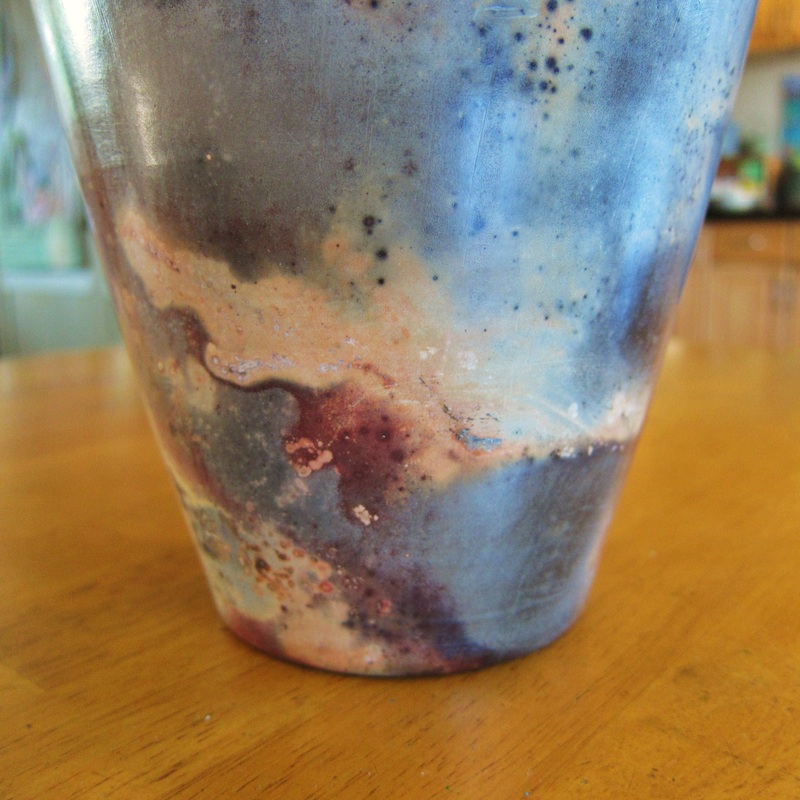
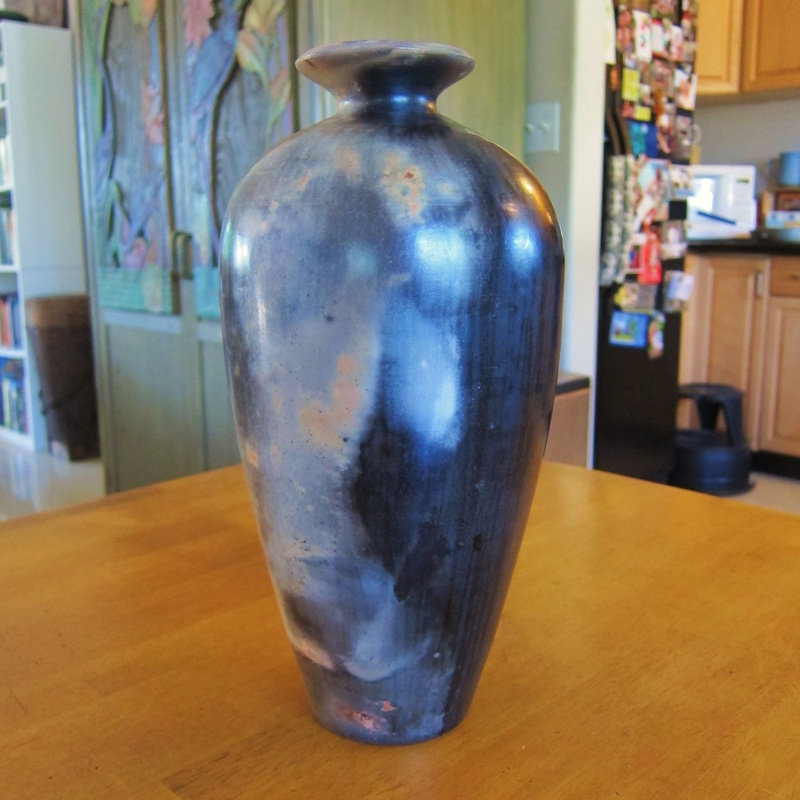
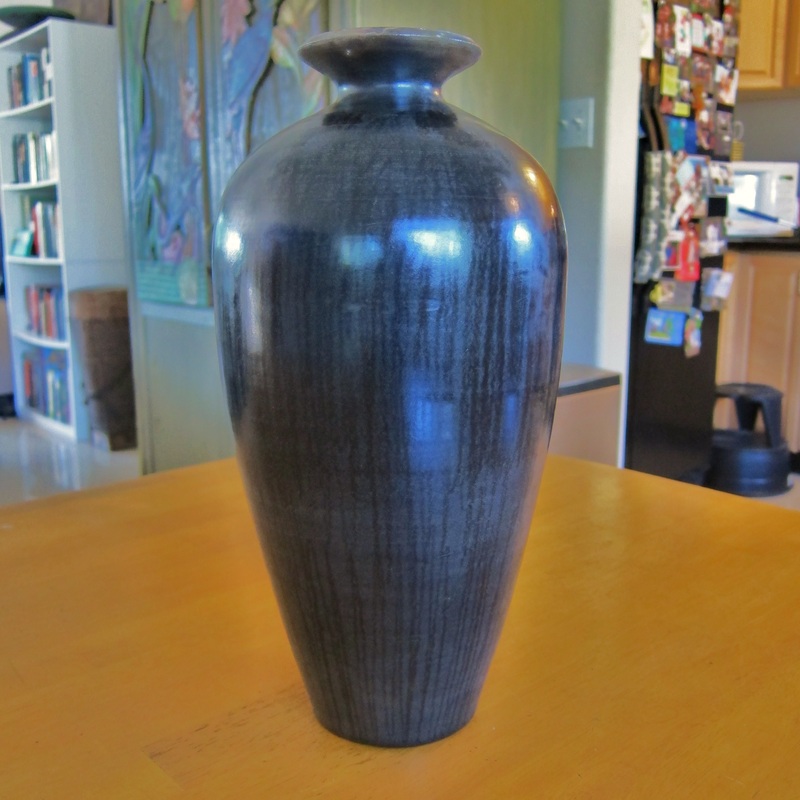
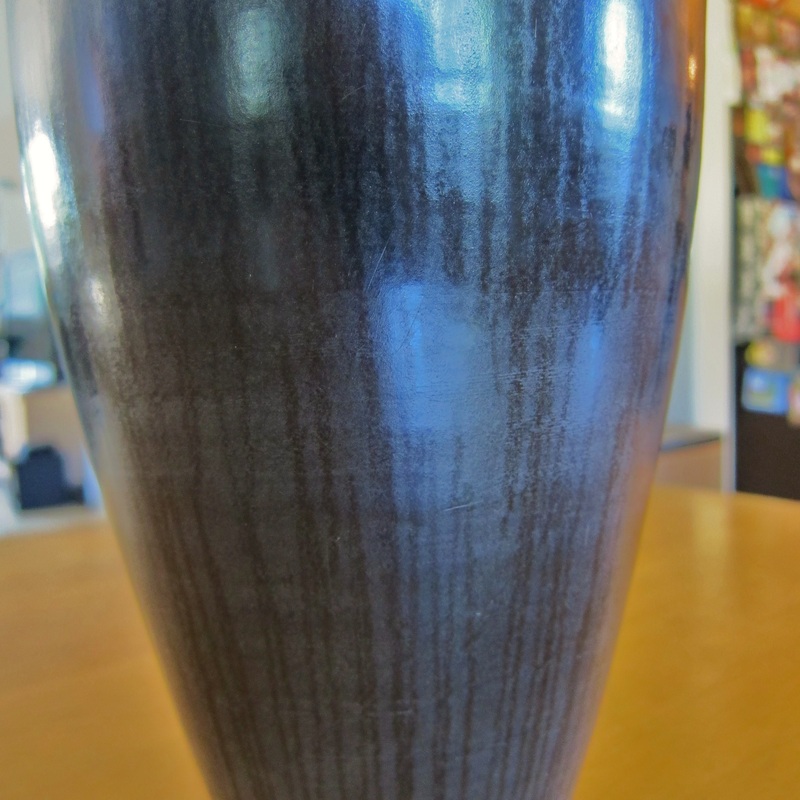
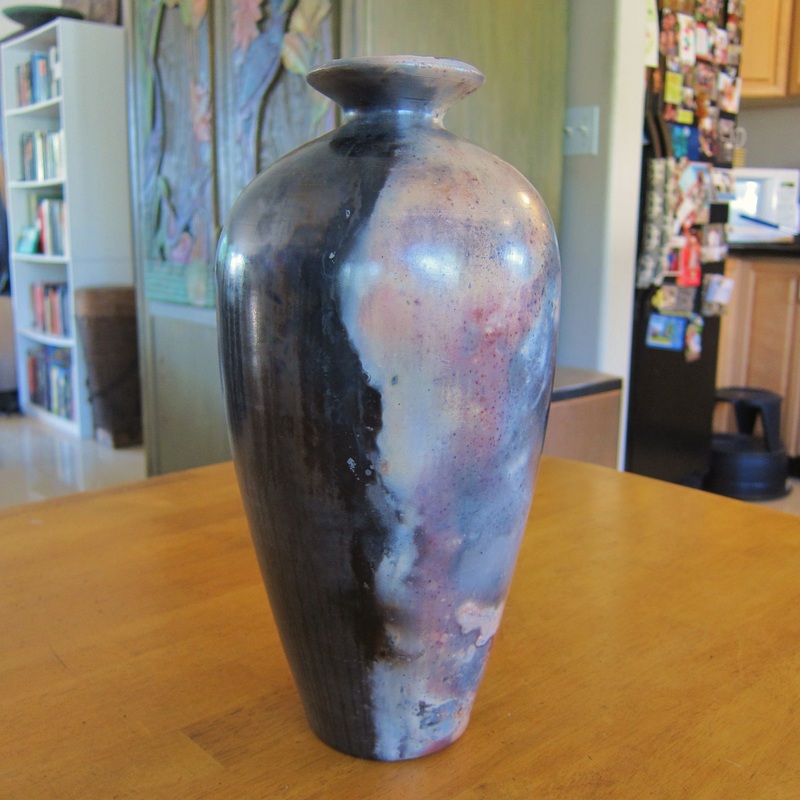
I tried a few different things in this pit firing. First, I tried spraying terra sig in a different way. Everything I've read says not to make any drips on the pot with terra sig or it will show up on the finished pot. I decided to heavily spray different areas of the vase so that the terra sig cascaded down the side like a waterfall. So far as I can tell, it didn't make a difference to the finish. Eventually the terra sig absorbed into the clay and I couldn't see any trace of where it had dribbled down, both in the greenware and in the finished pot. Second, I tried burnishing the pot in a different way. After spraying the vase with terra sig and then burnishing with a plastic bag, I used a hole cutter to burnish it. I moved the metal cylinder of the hole cutter up and down on the vase which left much more glossy marks than the plastic bag. I didn't try to burnish the whole pot but wanted to see if these burnishing stripes would show up on the finished pot. They did and you can see what they look like in the images below. Still trying to decide if I like it or not, but it gave me the idea that different patterns could be put on the terra sig using this type of technique. I'm sure many have done this before, but it was a first for me. Third, I carved the outside of the bowl to see what texture would look like in a pit firing. I had a bowl exactly like this in the last pit firing in January, but someone knocked it off the table just before we put it in the barrel and it broke into about a dozen pieces. So I made another one, and I like the way it turned out. The high areas tend to be darker, especially the ones with more carbon, which highlighted the carving. Fourth, I wanted to see if I could successfully pit fire one of my bowls. In the last firing, I removed the bowl from the barrel after about 20 hours and it immediately started cracking so I had to throw it away. In this instance, I left it in the barrel for about 36 hours so it was cool enough to remove with my bare hands. It was still warm when I took it out but it didn't crack. Fifth, I tried out a new clay, Nash White, which was formulated by Paul Nash, ceramics prof at Windward Community College. It's a great clay to throw and performed well in the pit firing.
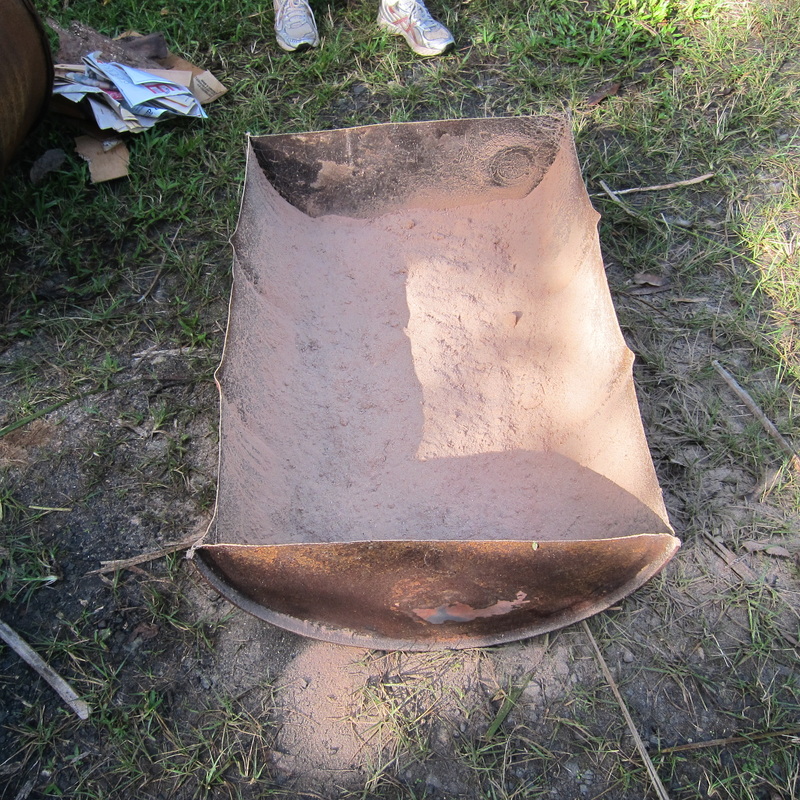
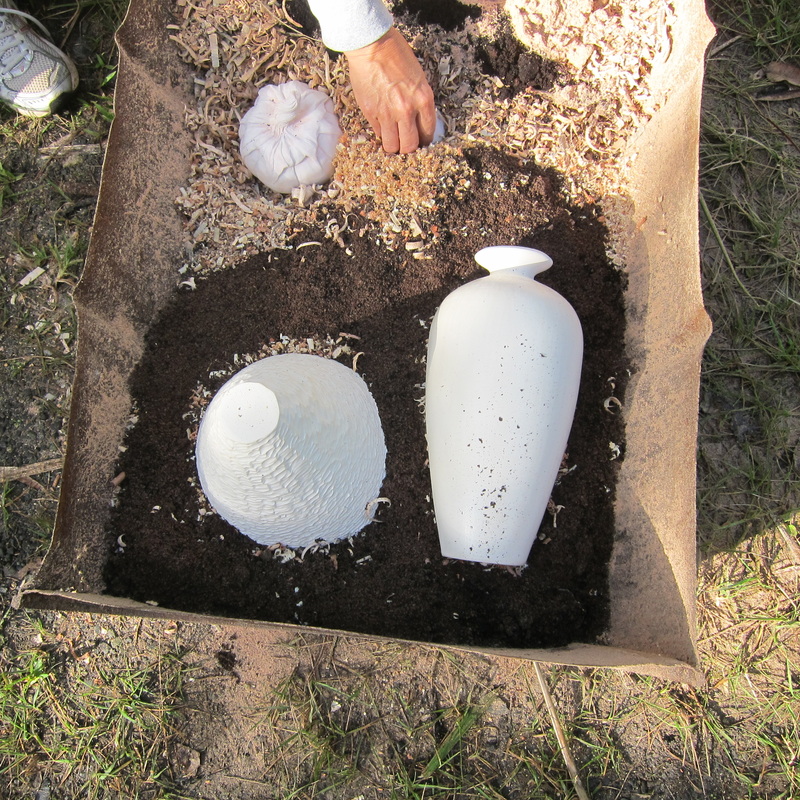
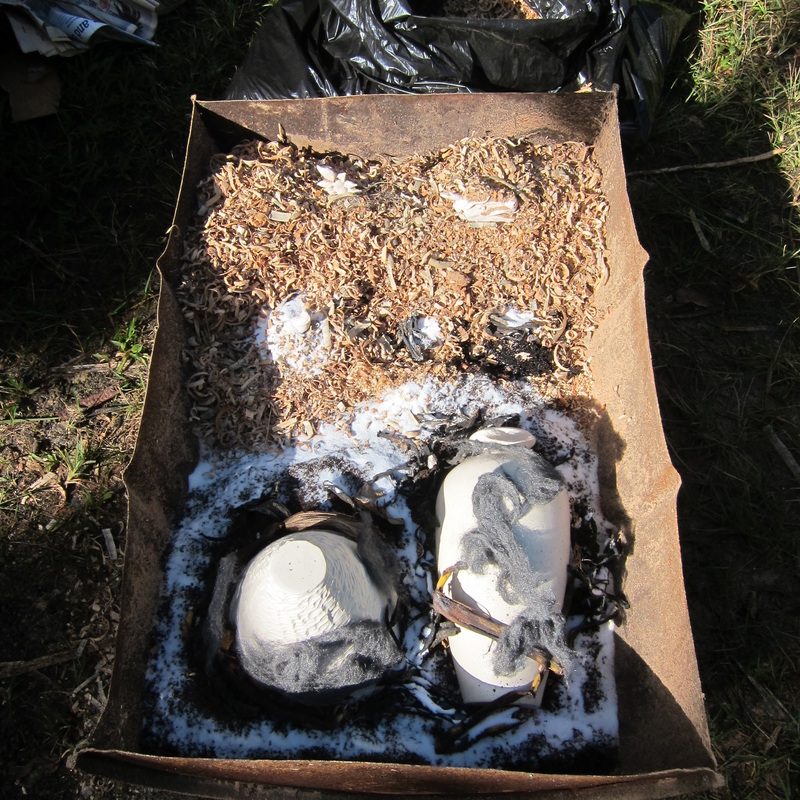
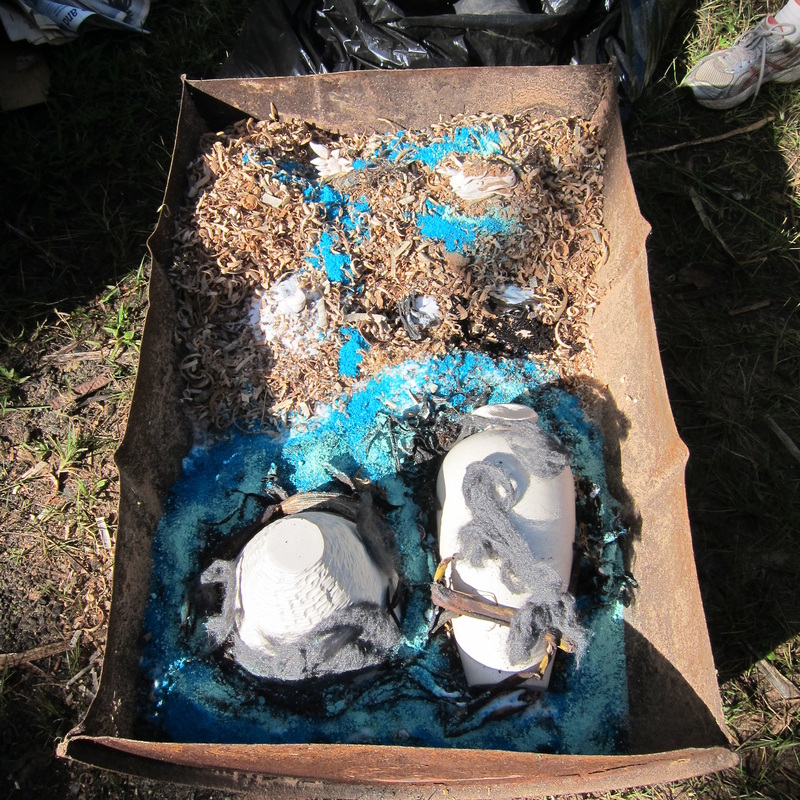
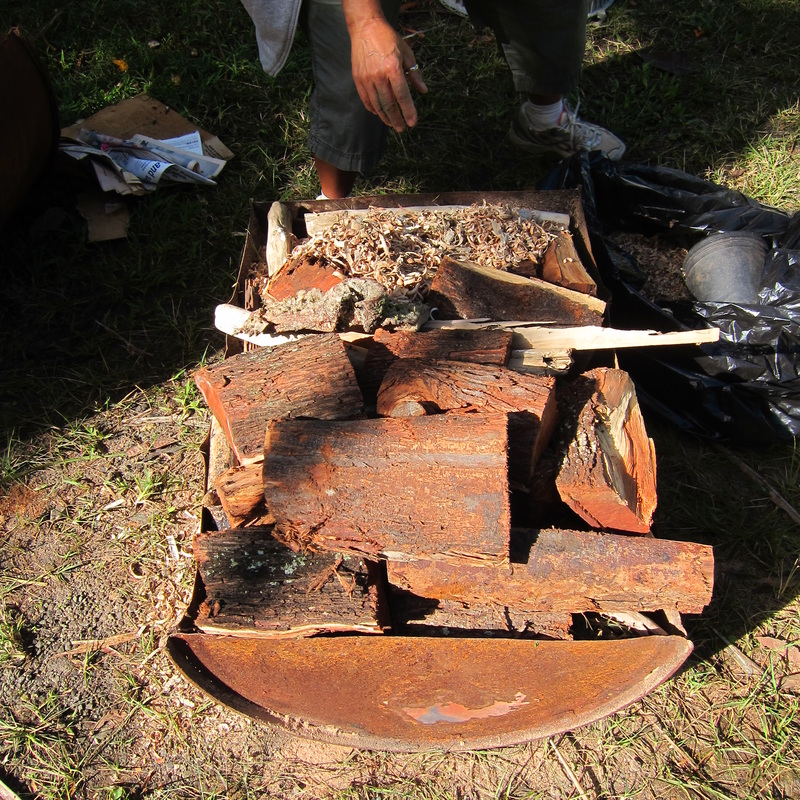
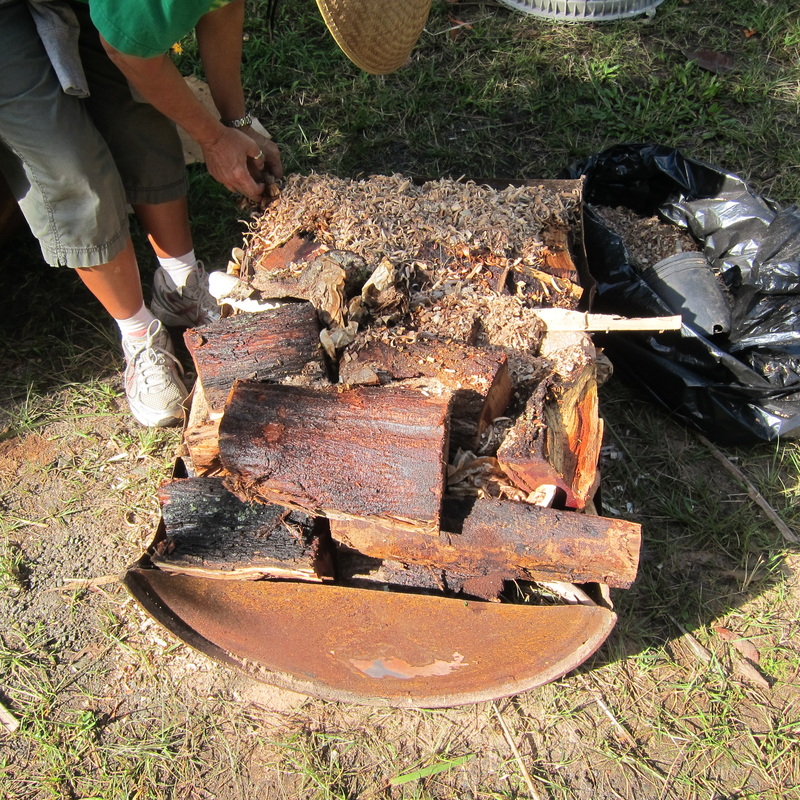
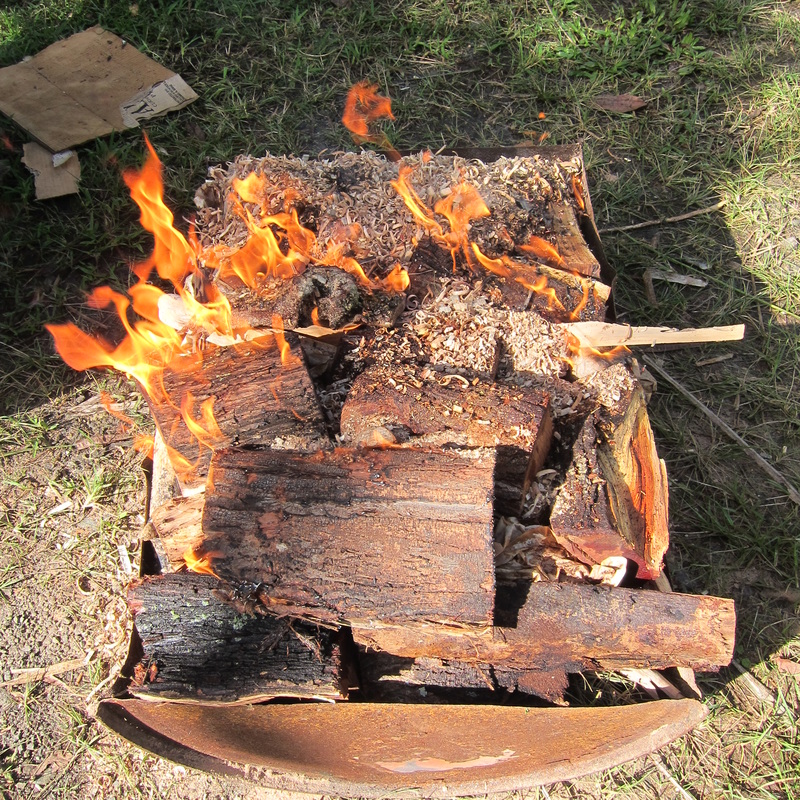
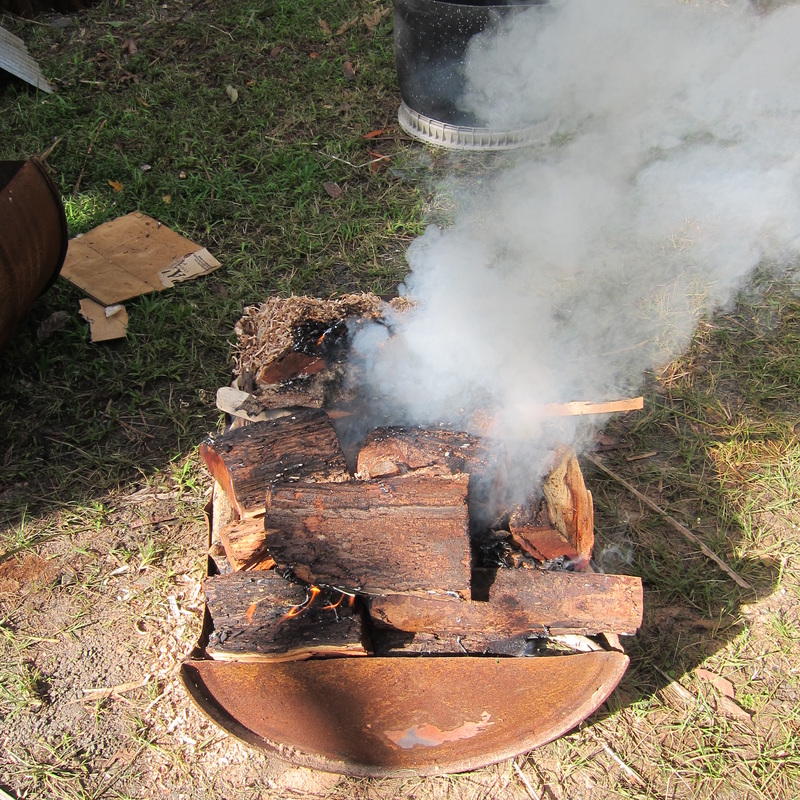
I did learn a few things about how to set up a firing more effectively by making more mistakes. First, make sure your wood is in small enough pieces. The first pit firing I did used fairly small pieces of kiawe that were a fourth the size of the largest pieces we used in this firing. The smaller pieces ignited more easily, the fire burned hotter, and burned down more quickly. The pieces of kiawe we used for this firing had been split but were still so big that they only smoldered through most of the firing. I removed some of them toward the end because they threatened to fall down on the pots and crack them. Second, make sure your wood is dry. We've been pit firing at Steve Martin's house in Kaneohe which is in one of the rainiest parts of Oahu. The wood had been left out in the open and was still very wet. This made it difficult to get the fire started, even with lots of kindling and even after I used quite a bit of lighter fluid. Because the fire never burned that hot, the pots turned out pretty dark again and didn't develop as much color or high contrast between color and white and black as some of my first pit fired pots. Third, don't use too much fine sawdust. Steve has some huge bags of fine sawdust that were given to him. They're so fine they're like flour. We put that on the very bottom to act as a base. We put coarser, fluffier sawdust on top of this and laid our pots down on that. Last time I didn't get a good jet black finish on the pots when I placed them on the fine sawdust, maybe because not enough air could get in. The lady who was firing with me, however, buried her dragon and other small pieces in fine sawdust. After the fire had been going for almost 5 hours, she dug around her pots to see how they were doing and a few inches down the sawdust hadn't even started to ignite and the bottom half of her pieces were still white. Maybe it would have burned down in time, but she dug around the pieces and exposed them more to air which caused the sawdust lower down to ignite and gave her a more even color. We then put small slivers of wood around the head and tail of her dragon which ignited, burned off some of the carbon, and made those areas a little lighter. Her goal had been for the dragon to be darker on the bottom half and lighter on the top half. With these adjustments we were able to accomplish this.
I did learn a few things about how to set up a firing more effectively by making more mistakes. First, make sure your wood is in small enough pieces. The first pit firing I did used fairly small pieces of kiawe that were a fourth the size of the largest pieces we used in this firing. The smaller pieces ignited more easily, the fire burned hotter, and burned down more quickly. The pieces of kiawe we used for this firing had been split but were still so big that they only smoldered through most of the firing. I removed some of them toward the end because they threatened to fall down on the pots and crack them. Second, make sure your wood is dry. We've been pit firing at Steve Martin's house in Kaneohe which is in one of the rainiest parts of Oahu. The wood had been left out in the open and was still very wet. This made it difficult to get the fire started, even with lots of kindling and even after I used quite a bit of lighter fluid. Because the fire never burned that hot, the pots turned out pretty dark again and didn't develop as much color or high contrast between color and white and black as some of my first pit fired pots. Third, don't use too much fine sawdust. Steve has some huge bags of fine sawdust that were given to him. They're so fine they're like flour. We put that on the very bottom to act as a base. We put coarser, fluffier sawdust on top of this and laid our pots down on that. Last time I didn't get a good jet black finish on the pots when I placed them on the fine sawdust, maybe because not enough air could get in. The lady who was firing with me, however, buried her dragon and other small pieces in fine sawdust. After the fire had been going for almost 5 hours, she dug around her pots to see how they were doing and a few inches down the sawdust hadn't even started to ignite and the bottom half of her pieces were still white. Maybe it would have burned down in time, but she dug around the pieces and exposed them more to air which caused the sawdust lower down to ignite and gave her a more even color. We then put small slivers of wood around the head and tail of her dragon which ignited, burned off some of the carbon, and made those areas a little lighter. Her goal had been for the dragon to be darker on the bottom half and lighter on the top half. With these adjustments we were able to accomplish this.


 RSS Feed